|
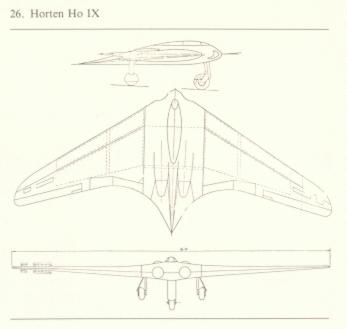
Almost unknown
today, the all wing twin-jet GO229 was probably the most startling and
unconventional warplane built during the WWII. It stemmed from the belief of the
brothers Walter and Reimar Horton that a flying wing was the most efficient form
of heavier than-air flying machine. They set out to prove this with a series of
gliders, beginning with the Horton I of 1931.From 1936 the brothers were
officers in the Luftwaffe, but continued their work, which led in 1942 to
studies for a flying wing jet fighter. Accordingly, work was hastened on two
prototypes, which was all the small team could contemplate. The Ho IX V1
was to fly as glider, subsequently being modified to install two BMW 003 A
turbojets. Gliding trails at Oranienburg began in about May 1944 ,and from the
start the handling characteristics were out slantingly good. In addition to V1
and V2 ,seven more prototypes were ordered, plus 20 production fighters. The
Go-229 V2 began it's flight test program at Oranienburg in January 1945. Take
off required less than 450 m and handling was superb. The 1000ł design concept:
carry 1000kg of bombs at 1000kph with penetration range of 1000km. The Ho-229
was made of wood to save weight and because wood was not a strategic material
and was painted with radar absorbing paint.
Predicted
Performance From
SWOTL Instruction Manual
Power plant two Junkers Jumo 004-B1 turbojets
Thrust 1,962 lbs
Top Speed 590mph at sea level, 607mph at 40,000 ft, and 640 mph in a dive
Rate of Climb 4,430 ft/min
Ceiling 52,500 ft
Range 1,180 mph @ 393mph
Wingspan 45 ft, 11 in
Wing area 376.6 square feet
Length 24 ft, 6 in
Height 9 feet, 2 in
The Kit:
The kit features great mold
quality, fine detail in a light grey plastic. There's just one sprue of
photo etch, and unlike the single seat variation, no engine or
"framing" detail inside. The canopy is very clean but one piece.
The cockpit and nose wheel well is boxed in and provides some pretty nice
details, and there are solid wing attachment points. Although short on the
detail will make for a much quicker build project then the day fighter version.
Four early air-to-air missiles
are included with the kit.
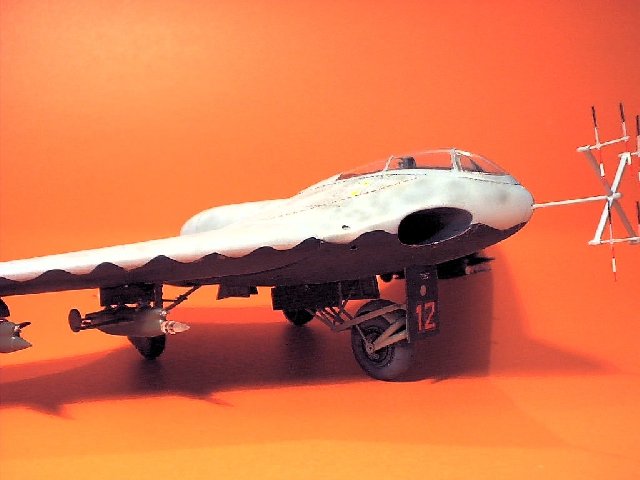
Only one scheme - is provided on
the instructions, RLM 75 camouflage spots over RLM 76 with a matte black under
surface.
Construction: I have
completed steps 1-4 which included gluing together the pilot and radar
operator's seats as well as attaching them to the cockpit floor. A square
piece of photo etch has been added to simulate the radar and navigational
controls. I have added some aftermarket seat and shoulder belts from Extra
Tech and have painted the interior RLM 66. The fuselage halves have been
glued together and there is no need for any filler. (Photos of the build
up will be posted in the next few days.)
The next steps of
construction included gluing the nose section to the main fuselage section, you
must be careful because there is basically three areas that have to line up.
What I found was that I could have spread the nose section out with a piece of
sprue, so that the nose and body would have meshed up a bit better. I had
to do a bit of sanding after running some filler around the entire join line.
Once the body and nose section had been smoothed out I started on the wings.
The first step with the wings was to drill out the four placement holes for the
air to air missiles. Once all drilled out I carefully super glued the wing
halves together. When they were dry I glued them to the fuselage. The fit
of the wings to fuselage is decent and should only require a small amount of gap
filler.
Once the leading
edges and the fuselage joints were smoothed out, I glued in place the canopy
which required some special attention around the edges, I used a combination of
filer and Mr. Surfacer to fill the gaps and smoothed it out. Once in place
I carefully masked the canopy using Tamiya tape. The model was ready for
the extensive painting process.
Painting: I started out by
painting all of the upper panel lines with RLM 66. When it was dry to
touch I painted the top of the plane with RLM 76 Licht Blau, and then carefully
mottled it in a random pattern using RLM 75 Grey Violet and added some mottling
with RLM 02 grey. When all was applied I lightly misted RLM 76 over it to
tone down the mottling. I left the plane to sit over night to make sure
the Gunze acrylics were thoroughly dried before continuing on with the bottom of
the plane. I used the Tamiya masking tape to make a template for the
leading edge of the wings. I laid a piece of tape the length of the wing
down onto a piece of aluminum foil and then drew out the pattern and carefully
cut the template out. The template works great cause you can just flip it
around for the opposite wing. with the template in place on one wing I
carefully painted the underside using Tire Black. This colour has a bit of
grey in it, and gives the model a better scale effect. Once one side of
the plane was painted I reversed the template and painted the other side.
while the paint cup had some paint still in it, I went ahead and painted the
wheels and the landing gear doors. All of the smaller pieces would be
applied last, when the model would be nearly finished. A few more mask
jobs on the top of the plane and the landing gear bays, and the plane was
completely painted and allowed to dry over night. The final steps of the
finish included spraying a few coats of Johnson's "Shine Magic"
applying the decals and and then recoating with a few more coats of the clear
sealer. The last step was applying a mixture of the Shine Magic and Tamiya
Flat Base, in a 7:1 ratio for the matte coat.
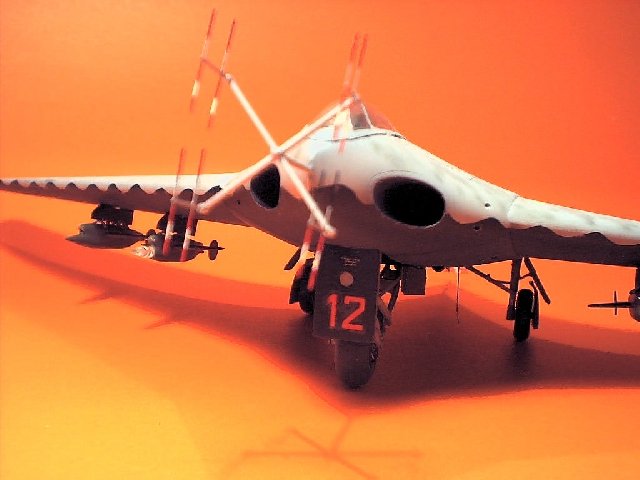
Final construction
notes: I removed the mask from the canopy, built and installed the
landing gear which really sets off the plane, built all of the Henschel
Hs 298 air to air rockets and finally attached the antennae arrays on
the front and back of the plane. The plane was finally completed.
The kit was not a
difficult model to build, but took longer then I expected. With all the
added accessories as well as the complicated paint scheme. When completed
the aircraft is very impressive looking and will provide for an excellent topic
of discussion.
Anthony
(click on
the image below to load the full size photo)
Visit Anthony's website "The
Model Hanger"
|