|
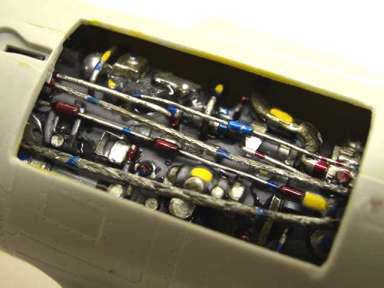
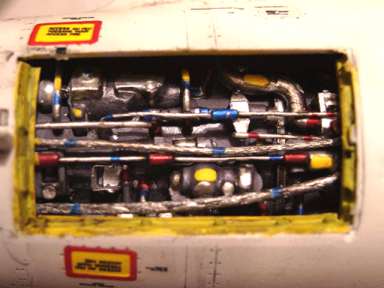
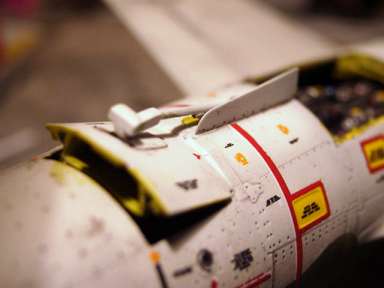
Engine bay:
|
Well, that's always the most
difficult part to do, as this was the second time I did it...I learned
from the mistakes I made the first time around!
I made a section of the
engine, ok it doesn't look like the real one.....if you can't find where the
hydraulic pump is....don't worry! I think I forgot it, but it is
good looking! The only think I expect is for it to look good!
About the panel, well it's the
same. I just sanded the panel I cut from the kit, added plasticard
to it, some resins parts, wires...it's looks like a road map!
|
|
Wheel well:
|
|
|
From Aires, also a wonderful
job, but not easy to install. Ok, my problem came in that I opened the electronic bay and gun bay, so the front wheel well
has to be
cut, to be part of the back of each bay.....after a entire box of
TYLENOL...(In Belgium we say Aspirine) the job was done!
The other problem was the main
wheel well, in fact it was not easy to install, one thing I understand after,
is that if you don't put it right......the wings of the model won't sit
level when the model is finally standing on it's landing
gear. So, as the model has a wing little lower than the other
one...the only solution was to sand a wheel. Ok, don't throw rocks...it
happened. So, don't forget to try it
" blank" several times.
|
|
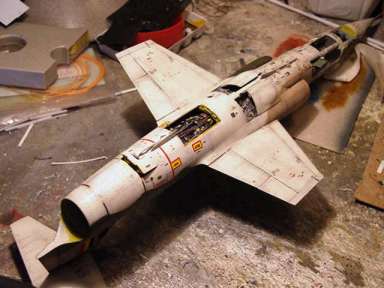
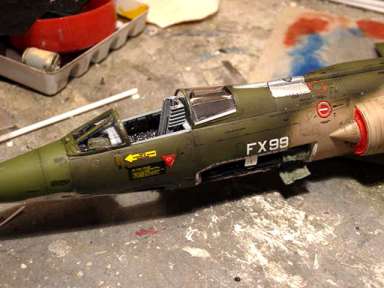
Fuselage:
The closing of the fuselage
was not something that was easy accomplished, with all the parts I added, but with the used of
Cyanochrilate glue it works well. At this stage, I didn't assemble the
exhaust. Why?.....just to be able to handle the plane for the rest of the job.
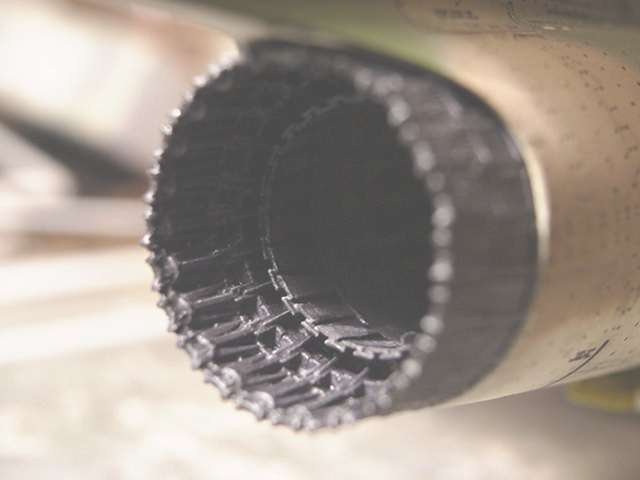
Exhaust:
|
From Aires, wonderful job, so
fine....too fine....specially when you let drop some TESTORs bottles on it! It was broken in 7 parts, all the parts were lost on the ground! 20
minutes of searching, with my nose on the ground and with the help of a big search
lamp. Ok, I forgot the precious help of my dog.....So, after this heroic
fact, I rebuild all the exhaust and put it Wayyyy off my workbench. It was
painted with TESTOR METALIZER, a wash of TAMIYA smoke, and a coat of matt
varnish.
|
|
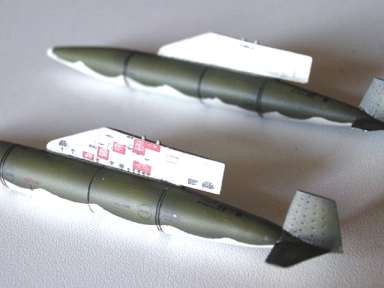
Wing tanks:
From BB, but as the guy from
the base told me, they are WRONG!, in size (too thin), the fins are wrong
too ( too large) and you'll have to delete the ventral fin too.
I used the pylon from the CE
set, and only glued them at the end of the building stage......you know
why huuuhhh !
The tip tanks are from the
kit. I put a coat of TAMIYA white primer on, then a coat of yellow, then I
made the Tiger stripes. Thankfully, a guy from the Century series (discussion list ) told me that
I was wrong in the stripes scheme....NO
problems, as the black was Humbrol, I used a spray to clean hooven. As the
base was acrylics, it didn't move, but the Humbrol was washed !
Gears:
No major problems, they are
really nice. just added some wires around.
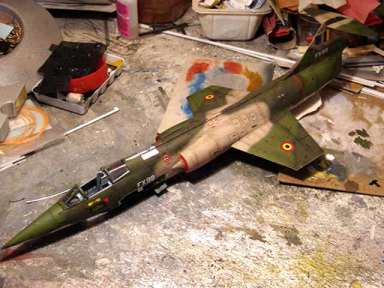
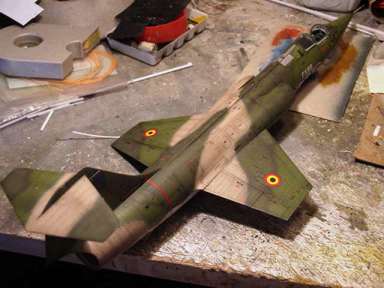
The paint job:
The bottom received a coat of
TAMIYA spary, AS 16 ( light gray), then some coat of HUMBROL light
grey with white in it.
The top, Tan is from DACO
paint, the dark green too. The light green is from TESTOR.
About the DACO paints, a
friend of the model club told me ( later when the job was done !) that
I've to used the thinner from DACO. Why...because it need hours to dry,
and you know why... I didn't have this thinner when starting the job, so I weathered the paint
directly, adding yellow into the green and white into the tan. With every
mixed I airbrushed each panels, one by one. With this, I have 3 coats of
each colour!
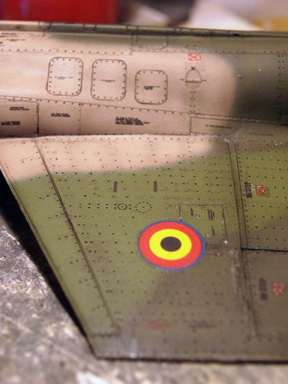
A coat of FUTURE before
decaling, an other coat of FUTURE after decaling and then a coat of mixed
Gloss / matt from TESTOR.
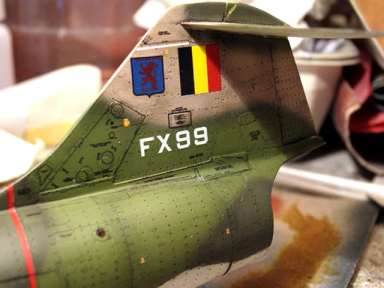
Patrick
| Part 1 |
Part 3 |
 |
 |
| 1/48
Hasegawa F-104G in Belgium markings |
1/48
Hasegawa F-104G in Belgium markings |
|
|