|
The
Kit
Academy’s
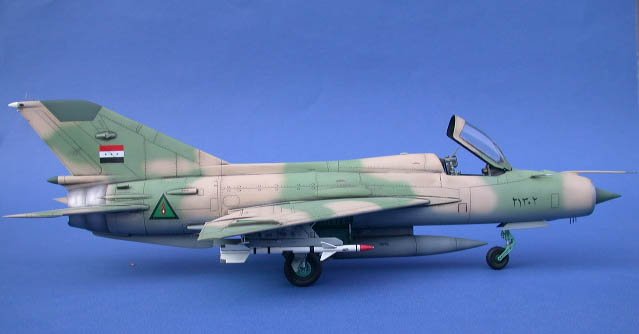
Mig-21 PF kit is probably the best kit out there, in 1/48 scale. The kit features recessed panel lines, weapons stores,
a decent cockpit, good detail in the wheel wells, and the overall dimensions
fair quite well according to reference materials.
Construction
When I first planned on building the Mig, I had originally decided on out
of the box. However, when visiting
my friend’s hobby shop, he eagerly showed me a detail set from a little known
company, back then, called FM (Fine Detail) from Hungary.
It was a Mig-21 PF cockpit set (489806) designed around the Academy kit.
Upon inspection I was extremely pleased with the fine detail (no pun
intended here) of the set. The seat, cockpit tub, sidewall, and coaming are
resin. The instrument panel and
other small details are photoetch, all included in the set. The SK-1 seat is
probably the only seat accurately represented in this or any other scale to my
knowledge.
The cockpit was painted and
assembled per instructions and fitted into the two forward sections of the
fuselage. Before the two forward
fuselage halves were assembled, the intake nose cone was painted and inserted
along with the cockpit. The cockpit
goes right in without any modifications or cutting.
My only problem arose when I affixed the forward fuselage section with
the aft portion of the kit. The two
halves didn’t quite line up well and this left a noticeable step and gap. In my opinion, this is the only major flaw in an otherwise
great kit. I fixed this problem by
first applying putty around the joint and then sanding it smooth, to fill the
gap. Immediately, I went over the
same gap with Super Glue. The Super
Glue is absorbed by the putty and forms a stronger bond. Once this dried, it was sanded smooth. Any lost panel lines were re-scribed with a sewing needle in
a pin vise.
The rest of the plane went together well with no further complications.
I then focused my attention on the weapons and centerline fuel tank.
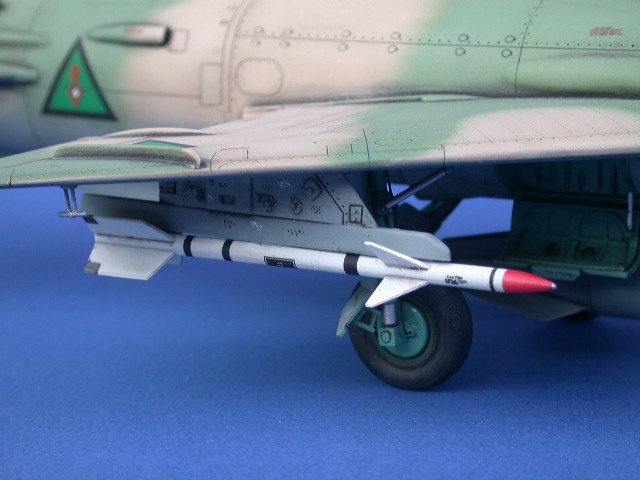
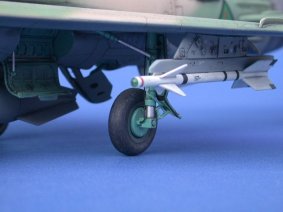
I decided to display my plane with two versions of their R-3 Atoll
Air-to-Air missile. One would have
the Radar nose while the other would carry the IR seeker head. The IR missile would have a clear lens so I fashioned one by
cutting approximately 1/8th of an inch from the kit’s seeker head
and attaching a piece if clear sprue, which I turned on a lathe to the same
diameter as the missile body. The
new seeker head was then super glued to the kit’s missile body and sanded
flush. I then took progressive
finer sand paper and polished the seeker head until it looked like glass. This
section was then masked off for painting.
|
Click on images below to
see larger images |
 |
 |
Painting
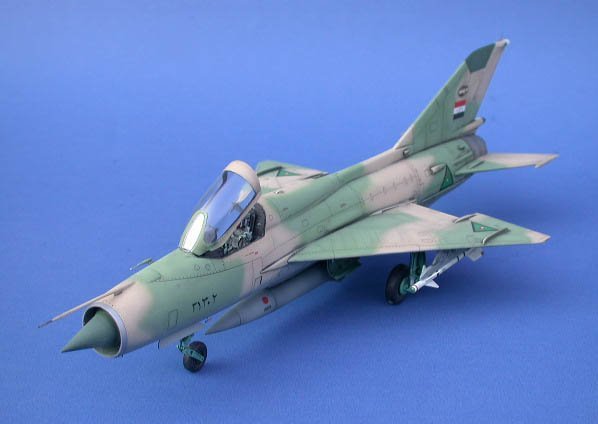
I had decided to paint my plane in the colors of the Iraqi Air Force back
in the early to mid ‘80’s and using Super Scale decals. One of the questions I’m often asked is, what colors
did the Iraqi’s use and what are the FS equivalents.
As with all my models, I don’t subscribe to the idea of exact FS
colors or authentic colors. What I
prefer, and this is only my opinion, is this.
Paint your model as close an approximation as possible.
If the colors look good to you and you’re happy with them, then
they’re the right colors. The idea here is not whether the colors are exact, but how
well you put them on that should matter. You
can research to your hearts content and get the exact colors as the real plane,
but if you just shoot them on your model, you’ll most likely end up with a
monochromatic look.
By varying the tones and shades of your paint, you wind up with a more
three dimensional and realistic aircraft. Well
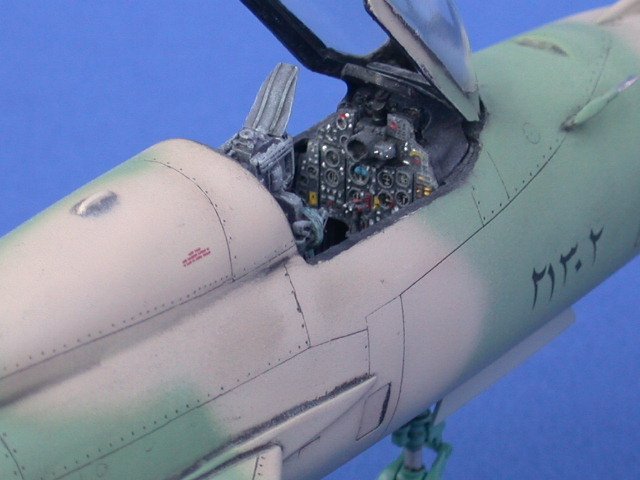
enough of the sermon, lets get back to painting. The cockpit called for an
overall flat black scheme. Rather
than just shoot flat black, I mixed flat black with a touch of gray to lighten
it up a bit. I find that straight
flat black looses the detail, especially on such a wonderful cockpit set. (MiG.6.jpeg)
|
Click on image to
right to see larger image |
Once the cockpit was sprayed, I
took some of the base color and added more light gray.
I then dry brushed all the surface details with this mix.
Now all those nicely raised details popped out.
I then went back with a lighter gray and picked out the dials and
switches.
|
|
The
seat was painted a light gray with light blue straps.
The seat was then sprayed with Future and a wash of dark gray and raw
sienna applied over the seat.
Next came the aircraft itself. I started by doing a pre-shade of the
entire model. In essence, I take a
dark gray paint and spray along the tops of all the panel lines.
You don’t have to be precise, so long as you get the lines defined.
Next, I sprayed the underside with a blue-gray mix, making sure that I
didn’t cover the entire underside in one pass.
Take your time and spray light coats.
The idea here is to fade out the panels gradually until a hint of the
panel shading is visible. The
topside colors of Sand and Light green are done the same way.
Once the model is painted to this point, I take the original colors,
which I call the base color, and lighten it with white.
This is my highlight color.
With this highlight, I color in each panel starting at the center and
working out towards the panel lines. Once
the entire color is done, you should have a very defined area, light inside the
panels and darker along the panel lines. At
first, this may seem a little overdone, but we’re not through yet.
Now take your base color and thin it down to approximately 70%
thinner to 30% paint. Now carefully mist, in light coats, the appropriate colors
over the entire model. Make sure to
stop from time to time and step away from your model. Give your eyes a rest and then come back and check the tones
and shades. I find this helps, as
my eyes won’t get use to one particular tone of color.
Once I’m satisfied with the balance of shades and highlights, I spray
several light coats of Future over the entire model.
I let the Future cure for a day or two before proceeding with my wash.
The wash is a mixture of flat black and dark gray thinned with mineral
spirits. I paint each panel line with this mixture and allow it to dry
for approximately five minutes. I
then take a dampened rag of mineral spirits and wipe the excess off.
Once this is done, I place the decals on the plane and set it with
Solvaset. Once the decals have
settled, I take a sharp hobby knife and cut along the top of the decal where the
panel line runs underneath. Another
pass with the Solvaset and the decals snuggle down into the panel lines.
This is followed by another application of wash over the decal/panel line
as before.
Before
I spray the final flat coat onto the model, I attach the remainder of details,
like the antennas, angle of attack probes, etc. These are attached with super glue. The super glue leaves behind a shiny surface and this is
taken care of with the flat coat. That’s
why I wait until the very end. The
missiles are painted, weathered and attached in the same manner as the rest of
the model.
Conclusion
All in all, I enjoyed building this kit. The FM detail set made it that
more enjoyable. I’m planning on
doing a MiG-21MF in the future using FM’s detail set, which will include
avionics bays. I hope you enjoyed
this article and found the techniques worth trying.
Henry
|