|
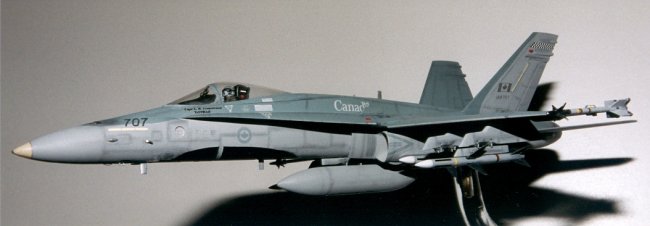
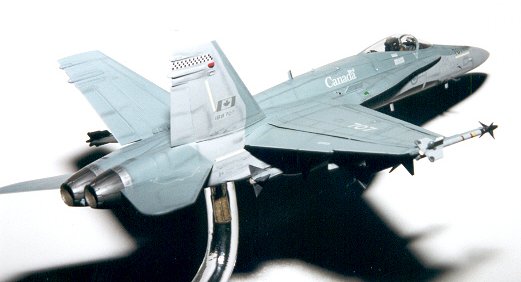
I recently completed a 1/48 scale CF-188 project,
built for a retiring Canadian Air Force pilot. This was the seventh such
Hornet model for as many pilots in the past eight years.
Using Hasegawa's plastic scale kit, I reproduce
the CF-188 in the configuration requested by the pilots. I also use Hasegawa
weapons and Leading Edge Models decals.
Although I always give the option of 'landing gear' down and on a base, the
pilots seem to prefer the aircraft cleaned-up and on a stand. I build my base
out of MDF wood and use a solid plastic rod for the stand.
|
Click on images below to
see larger images |
 |
 |
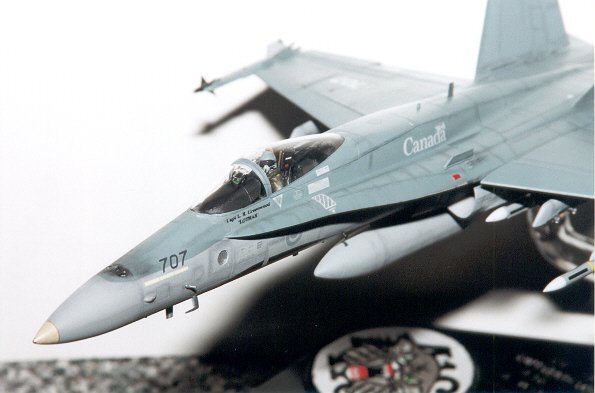
I start the project with the construction of
the cockpit and pilot. I use the kit supplied pilot figure, but many revisions
are required. First, I carve down the helmet (eliminating the visor cover) to
a smooth rounded surface. However, I keep the lens portion built-up. This is
to update the helmet and make it look like the Gentex 190a helmet (very
similar to the Gentex HGU-55) used by Canadian jet pilots. Next, I cut off the
badly mis-shappened oxygen hose. I use small diameter nylon string to form a
new oxygen hose. After cutting the piece to length, I glue it to the mask.
Next I use CA glue on the string to stiffen it to shape. Using a quick set
spray helps here. Then I use a slightly larger diameter string to form the
'packed' floatation device around the collar. Once the arms are glued into
position, I glue the control stick into the pilots right hand. Painting is
done to match the current CF-188 pilots flight gear. The helmet is two tone,
showing the darker areas (which represents leather areas on the helmet). The
lens is a glossy black. The mask has black straps holding it on, and a black
comm cord wrapped around the oxygen hose. The pilots at 4 Wing Cold Lake are
now wearing olive drab flight suits (NATO standard) with toned down squadron
patches. The survival vest and g-suit are a slightly greener olive drab tone.
The gloves are a medium brown colour.
|
Click on images below to
see larger images |
 |
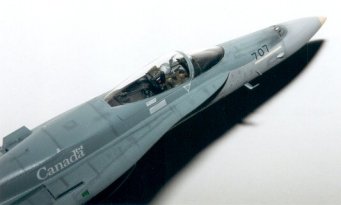 |
The rest of the cockpit and seat is painted
like any standard Hornet. Many photos exist on the internet that show what
these areas look like. I mostly use grey background with the panels painted a
matt black. Using small dabs of silver paint on the end of a round toothpick,
you can paint in some of the dials and buttons. I dry brush silver on the
panels and seat to give it a weathered look.
Prior to gluing the two model halves together, I
cut a hole in the bottom, build a 1" cube block out of sheet styrene, cut
a hole in the block, epoxy a square brass tube in the block, then epoxy the
block over the hole in the bottom half. This will serve as my connection to
the stand later. Another modification is the ID light on the side of the jet
(just below and ahead of the lex). After cutting out the circle shape provided
with the kit, I glue in the clear light cover piece (using white glue). Next,
I take a small piece of sheet styrene and paint it a silver-ish tone. Once
dry, I score lines across this piece to simulate the look of a head light.
Using white glue, I attach this in behind the clear piece to show that the ID
light is inset. This is the proper look for this light.
Extra weathering is required on the underside
of the CF-188. The jet has areas were exhaust gases, grease, and grime build
up and generally flow towards the rear of the jet. I use black washes (50/50
gloss black and thinner) under the finish coats and lead pencil filings to
obtain a subtle weathered look. Although I use Leading Edge Models decals for
my CF-188's, I always paint the false canopy on.
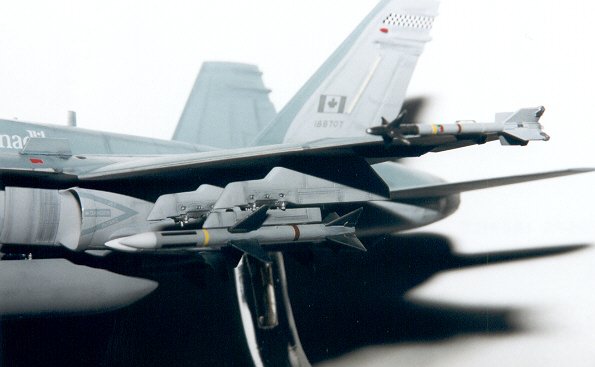
When placing the Aim-7 Sparrow missile on the
wing stations, a LAU-115 launcher is required. There is probably an
aftermarket LAU-115 out there, but I haven't found it yet. So, using sheet
styrene, I build my own. Use photos found on the internet to aid you in this.
the markings on the Aim-7 Sparrow and Aim-9 Sidewinder can be found on the
internet as well.
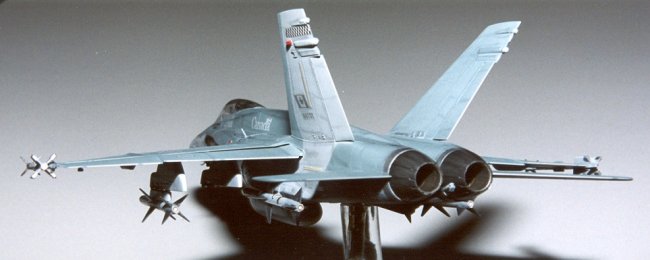
One of the methods I recently changed was the
'burner can' finish. I used to use a burnt iron colour to finish the aft
section of the cans. But after much research and examining photos, I came to
the conclusion that a burnished stainless steel looks more correct. After
using a black wash to fill the edges, I airbrush a stainless steel colour over
the cans. When the cans are almost completely dry, I give them a good rubbing
in with my pencil lead filing brush (minimal lead filings here). This rubbing
burnishes the paint to take on a dark stainless steel look.
One of the last steps in my projects is to
apply a dull clear coat over the entire model. This tones down the gloss, sets
the decals in nice, and provides a bit of a shell to the model.
There are obviously many more steps required in
these projects than what's described here. Careful examination of photos on
the internet and seeing the real thing at airshows will provide you with the
means to reproduce the CF-188 the best you can. Using Leading
Edge Models decals and instructions will really help you build a great
CF-188. Dave provides a wealth of knowledge in his decal packages.
Cheers, and I hope you enjoy modeling the CF-188
as much as I do. Please check out my web
site for photos and stories of other CF-188's I've built.
Lyle
email - tilt441@shaw.ca
web site - http://members.shaw.ca/tilt441/
|