|
I have always
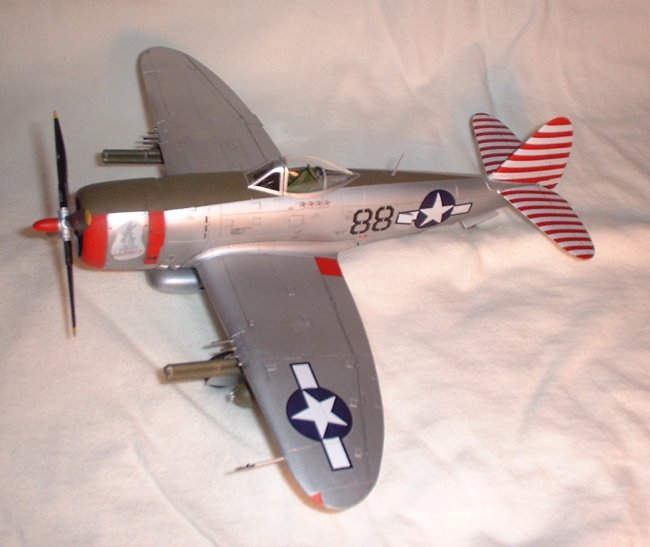
liked the P-47, and wanted the big "Jug" on display next to the
others in my collection. Even side by side with my F-117 Nighthawk, the plane
is impressive in it's mass. I'll pass on giving the details of the actual
aircraft and it's history, as there is ample info already posted on ARC. The
instruction sheet says this particular aircraft is from a squadron based at
Pisa, Italy in 1944.
This was my first experience with
an Academy kit, and I was very happy with the quality of the molding, and the
generous amount of optional parts. This kit was built straight OOB. I did have
to do quite a bit of sanding to eliminate the seams of the fuselage
halves. The upper wing roots required a small amount of filler to seal
the gaps from the wings to the fuselage. To accomplish this, I used the "sprue
and glue" method I found in the ARC "Tips & Tricks"
section. This worked great for this particular application. The cockpit
detail was good, engine detail was good, and I found the wheel wells to be
acceptable also. All could be improved with aftermarket products, but as I
said, this was strictly an OOB build. I paid $22.00 for this kit at a local
store, and I think it is a good value.
I used Model Master Metalizer
Aluminum for the overall finish, with OD green for the anti-glare panels. The
cowling was sprayed with Testors Red, and the entire plane was sealed with
Metalizer sealer, and a final coat of Testors Dullcoat after decals were
applied. I used the kit decals, which look great, but are very thin, and have
to be handled with care or they will rip before application. I was
slightly nervous about the tail section stripe decals, but they ended up
fitting very well, and with generous amounts of Solvaset, settled down
perfectly to the surfaces. Once dry, I cut the decals at the control surface
gaps, then reapplied more Solvaset. The stars and bars on the fuselage sides
are each a three-piece decal, and required very careful application. I used
lots of MicroSet to get these lined up right. The stencils (which are
numerous!) went on great, with no apparent silvering. My only complaint was
one of the two cowl decals, the "Rabbit" was too translucent, and
did not do as well as the rest of them. I used some pastel wash to accentuate
panel lines and control surfaces.
There were three different types
of drop tanks included, and I chose the large, flat, 200 gallon belly tank.
Weapons included a choice of 250 and 500 pound bombs, 8 five inch rockets, and
the triple bazooka tube launchers. I chose the 500 pounders, and tube
launchers.
Overall, a fun build, lots of
goodies in the box, and a good level of quality for the price. I don't think
this ranks up there with some of the Tamiya kits I've recently built, but
again, for about ten dollars less, it's worth having. This was the fifth kit
I've built since I started building again in the last year. Prior to that, I
haven't touched a model since I was a teenager in 1980... when I figured out
that girls were more fun than models ;-) I hope you like my submission,
and thanks to everyone else who contributes articles here, as they have been a
great source of information, and inspiration!
Brett
|
|