|
To
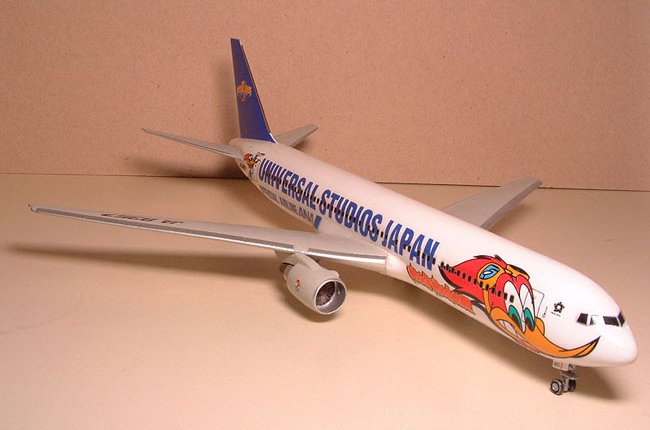
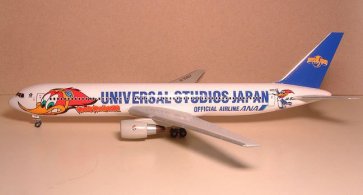
celebrate the opening of the Universal Studios Japan theme park in
Osaka
in March 2001, ANA painted one of their domestic B767-381s into this striking
scheme, complete with a big “Woody Woodpecker” image on the nose.
It took off on its first revenue flight in this livery on
Feb 21st, 2001
, from Osaka Itami bound for
Oita
, then onwards to Tokyo Haneda.
This
aircraft, JA8357, previously wore another special scheme before this repainting
… the very colorful “Pokemon”, with a picture of Pikachu on the nose.
I had the pleasure of taking pictures of this scheme at Osaka Itami and
Tokyo Haneda in this scheme, but unfortunately have not been back to
Japan
since “Woody Woodpecker” made an appearance.
This
model started out as a “plain-jane” Hasegawa 1/200 B767-200 in the Qantas
box.
However, when this scheme became available in decal form, it was an
immediate change of heart ...
|
Click on
images below to see larger images
|
|

|

|
All
the windows were puttied, and everything sanded smoothly, including the raised
panel lines which would have looked out of scale.
The wings were assembled and joined to the fuselage, and gaps received
the Tamiya putty treatment.
After
all surfaces were prepared properly (ie. Sanded smooth), the wings and
tailplanes got several light coats of Model Master Canadian Voodoo Grey, as I
did not have BAC707 handy …
Then
acrylic white (with a touch of blue) was sprayed over the fuselage, and after
drying for a few weeks, I overcoated it with several layers of Future.
After another few weeks of drying (did I mention that I’m a slow
builder ?  ),
I polished it out, made sure that the finish was ok, then applied the decals.
As you can see, I’m a fan of window decals, as I don’t like the
see-through look of empty windows.
It’s also easier to get accurate window counts this way, as different
operators have different window configurations, depending on how they set up the
interior layout (eg. galleys, toilets, etc) ),
I polished it out, made sure that the finish was ok, then applied the decals.
As you can see, I’m a fan of window decals, as I don’t like the
see-through look of empty windows.
It’s also easier to get accurate window counts this way, as different
operators have different window configurations, depending on how they set up the
interior layout (eg. galleys, toilets, etc)
The
trick to decaling large areas is to use slightly soapy water to soak the decal,
and put some on the model to “float” the decal around.
I don’t worry about the decal adhesive because I always overcoat the
model later, and even if you put the decal upside down, you can carefully float
it to adjust it properly, before carefully draining the excess water with a
tissue.
The thing to avoid is folding the decal onto itself, especially sharp
corners (eg. Woody’s beak, in this livery).
Even if you do that, you can still salvage it with copious amounts of
soapy water, as long as you are gentle and don’t tear the decal.
After
the decal has dried (so it doesn’t move around), I applied Solvaset to it to
nail it to the model.
After it’s dried a bit (maybe a day), I wipe it down carefully with
distilled water to ensure there are no stains, which will be very apparent on
the ultra-white fuselage.
A
few more weeks of drying time (did I mention that I’m a patient builder ? ),
then I wiped it down again (unless you live in a wafer fabrication plant, you
will get dust on the model …), then coated it with several layers of Future,
allowing each to dry before putting the next one on.
I
then used wet Tamiya #2000 sandpaper to lightly take down the orange peel, and
after that Novus #2 plastic polish applied with an old t-shirt gave it a nice
shine.
Tamiya Modeling Wax gave it a finishing touch (and make sure it is the
finishing touch … no paint will stick to the model after this step !)
This
model is intended for a friend who moves around a bit, so I left off many small
details which can be knocked off, like antennae, etc.
Keen Japanese airliner fans will notice that the red Hinomaru is not on
the port upper wing (and though you cannot see it, starboard lower surfaces as
well) … this will be done at some stage.
I
had a lot of pleasure building this model, and took my own sweet time in doing
it … altogether it probably took about 25 hours, stretched into about 9
months.
I feel that proper drying time is crucial, otherwise the lower layers
curing may crack the upper layers.
After
this, I have the sudden urge to do a model of its previous livery, the 1999
Pokemon scheme.
Now where did I put that Tomy kit ?
For
more information on the real aircraft, go to http://www.airliners.net
and do a “Registration” search for “JA8357”.
This will retrieve photos of the aircraft, including its previous Pokemon
’99 scheme, including one from yours truly.
Eric
|
Click on
images below to see larger images
|
|

|
|
|
|