|
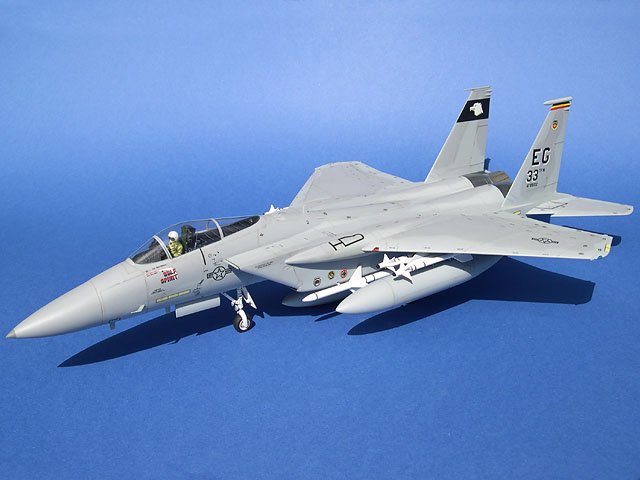
This aircraft is the
commanders aircraft from the 33rd Tactical Fighter Wing. This is one of 3 decal
options included in the kit.
I usually build WWII
aircraft but this kit was given to me as a gift so I thought I would give a
modern fighter a try. This model was built completely out of the box and
everything fits together pretty well as we have all come to expect from Tamiya.
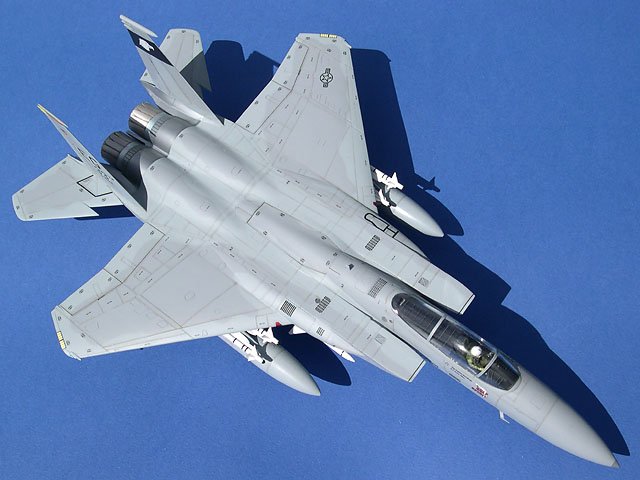
I used Tamiya putty as a filler to blend in the fins, wings and joints in the
fuselage. The only small modification I made was to file the bottom of the
wheels flat to give the impression of weight. There are certainly plenty of
places where this kit could be improved with after market parts if you want to
build a highly detailed replica as the kit cockpit and wheel wells are lacking
in detail.
|
Click on
images below to see larger images
|
|
|

|
Painting of the rear end of the
aircraft was done with Testors stainless steel buffable metalizer. This was then
buffed and sealed with Tamiya clear acrylic. The clear acrylic is important with
buffable metalizers as it allows you to mask over it without pulling off. The
aircraft was painted as per the instruction sheet using Light and Dark ghost
grey which were a custom mix of Tamiya acrylics. The aluminium band on the
exhaust nozzle was painted with Tamiya Chrome silver enamel and the rest of the
nozzle was a mix of Chrome Silver and gold. A little Tamiya clear blue was
applied to this area as well.
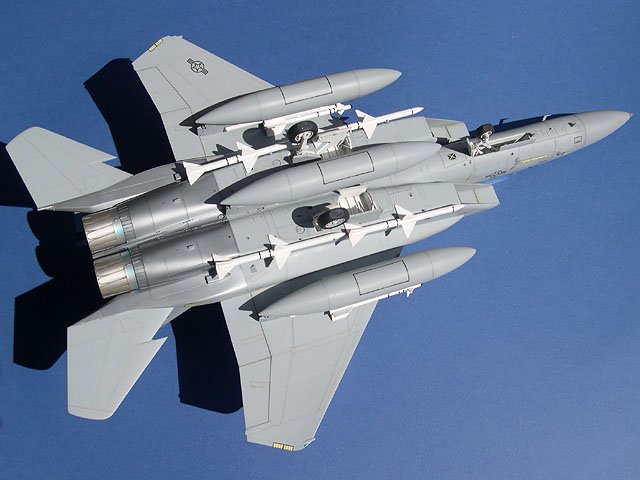
I kept the weathering on this
aircraft to a minimum. I sprayed a very thin mix of Tamiya brown/black acrylic
along all the major panel lines of the aircraft using low tack masking tape as
guide. I sprayed into the tape rather than away from it, this keeps the panel
lines nice a sharp which is the effect I wanted. If you attempt this technique
be prepared to complete the work over the course of several sittings and you
will also need a fine tip on your airbrush. I used the black nozzle with my
Aztek A470 airbrush. The landing gear and wheel wells were sprayed with the same
thin brown/black mix and drybrushed with white Jo Sonja artist acrylics. The
inside of the exhaust nozzles were painted with Tamiya flat white and staining
was completed by dragging brown and black oil paint with my finger to give the
scorching effect.
This was the first time that I
tried dipping a canopy in future floor polish and I was stunned by the results.
Now I know why this technique has become so popular !
Happy modelling!
Kevin
|
Click on
images below to see larger images
|
|

|

|
|