|
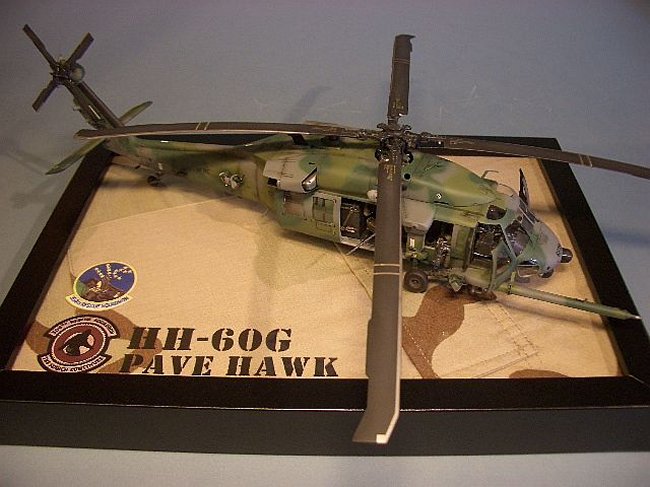
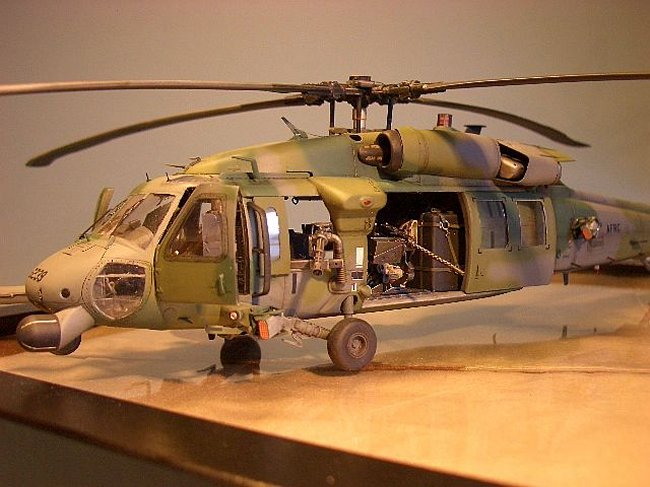
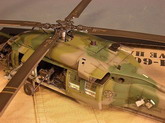
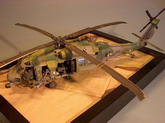
Here is my
latest project: an HH-60G in 1/48 by Italeri.
The
basic kit by Italeri has been modified considerably though. I
do not intend to spend much time complaining about this kit's poor accuracy of
fit, especially concerning the transparent parts' concavities.
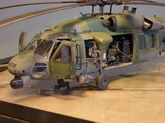
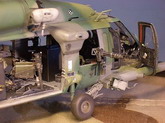
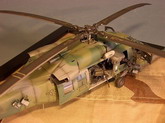
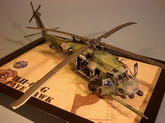
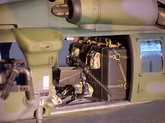
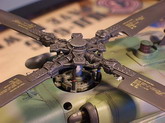
In
this model a lot of photo etched parts by Eduard were used which allowed more
details. Furthermore, I used parts of a conversion kit by the Cobra Company,
which were very helpful.
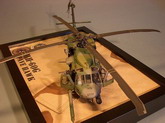
Additionally,
several components are self made. Starting with the interior, where Italeri
avoided to structure the headliner and provided only poor details. With profiles
and various small parts I created a lot of new components. The bottom, the
cockpit and the additional tank have been completed with etched parts and
assemblies by the Cobra Company. Moreover, the
interior walls have been redesigned, since the original's main gear, for
example,
is not visible from inside. Some avionics parts behind the pilot seats have also
been created by me.
Click on
images below to see larger images
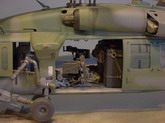
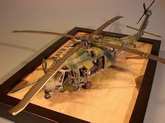
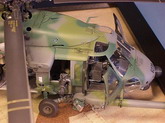
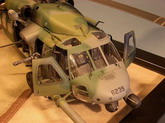
The
cockpit doors were given new windows and I had to replace the small, sliding
side doors completely, since the included parts in the kit were too thick. I
also revised the engines form and customized the engine casing. The six flare
and chaff dispensers have also been self made. I built two pieces for a mold and
reproduced them with resin.
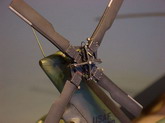
Transparent
lamps for the navigation lights would have been nice to have but were not
included in the kit, so they have also been self made.
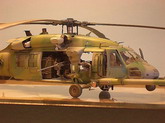
I
mainly used Model Master and Revell colors. Furthermore, I used products by
LifeColor, Vallejo and Andrea to paint the small parts. The
weathering has been made with oil colors, chalk and weathering-sets by Tamiya.
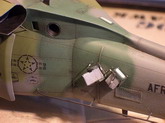
Since
Italeri's decals were just not enough, I hopefully bought decals by Aztec that
also included maintenance labels of all kinds. To my surprise, all the decals
that should have been black were printed in gray. So I scanned the sheet and
printed it in black on a blank decal sheet. Where I was in the process, I also
made new decals for the IDs. I downloaded the required font from the
internet.
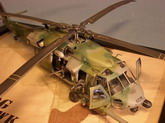
The
final model was ultimately placed on a picture frame by a Swedish furniture
manufacturer. I framed a shred of a U.S. Army jacket with airbrush writing and
small printed patches from the 304th Rescue Squadron.
I
really spent much time on this model and I was close to madness occasionally,
but finally, I am pleased with the result.
Lars Kolweyh
Click on
images below to see larger images
|