|
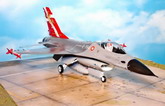
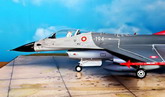
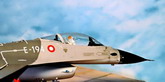
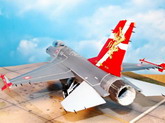
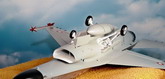
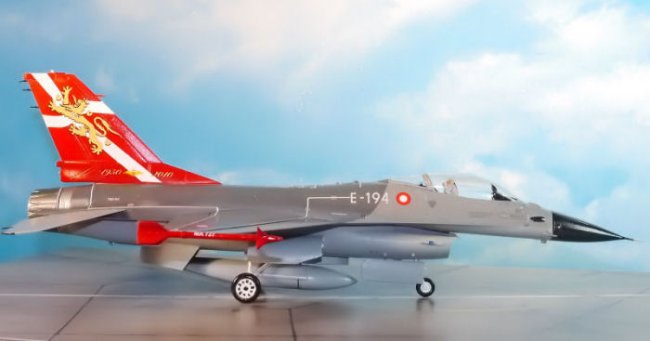
For your viewing pleasure, here are some photos of my Eduard F-16 AM Supersonic Fighter.
The F-16 Fighting Falcon, commonly referred to as the F-16 Viper, is a multirole all weather fighter/bomber. Originally developed as an air superiority day fighter by General Dynamics for the USAF, the F-16 has evolved into a world wide known fighter/bomber. Production of the F-16A was launched in 1976 and entered service with the USAF in 1979. Since then, more than 4,500 F-16s have been built.
The F-16 introduced many new features, such as: a frameless bubble canopy for better visibility, an ejection seat reclined 30 degrees to reduce the effect of g-forces, a side mounted control stick for easier control while maneuvering, and the first fly-by-wire flight control system. The F-16 has a fixed, forward firing M61 Vulcan cannon, and 11 hardpoints for various missiles, bombs, and pods. Besides the USAF, many NATO countries adopted the F-16 as their multirole jet aircraft.
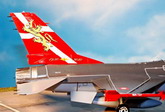
The big tail of the F-16 is a good place to paint an artwork. The kit provides large tail decals for four NATO countries; Italy, Denmark, The Netherlands, and Norway. I chose to go with the tail art for the Royal Danish Air Force. The Royal Danish Air Force celebrated its 60th anniversary in 2010. The aircraft received artwork consisting of the Danish Flag and a Lion on the tail.
|
Click on
images below to see larger images
|
|
|
Construction
Note that this Eduard NATO Falcons kit is a re-boxed Kinetic F-16 kit with a lot of Eduard PE and Brassin parts added to the kit. I built this kit out of the box using the plastic parts the kit provides. I was not interested in spending the extra time needed to install the many small PE and Brassin parts—many of which you will not see on the finished model. I did however use the PE seat belts and shoulder harness for the ejection seat.
Also note that the kit instruction guide doesn't provide assembly drawings for some of the assemblies where you use the kit plastic parts instead of the PE or Brassin parts, for example, the ejection seat. In the recent past I built a Kinetic F-16 and saved the instruction guide. So, to build this model I used both instruction guides.
Overall the parts fit for this kit was just fair. There were no huge gaps that required filling, but I did a lot of seam filling and sanding. Kit parts had a lot of flash and there were ejector pin marks all over the parts. I spent a great deal of time cleaning up parts before installing them.
Painting
The kit instruction guide provides color painting guides for four NATO F-16s. Since I chose to have my F-16 in the livery of the Royal Danish Air Force, I pretty much followed the paint scheme for an F-16 of the ESK370 Squadron, Royal Danish Air Force, 2010-2012. Here are the paints I used:
-
Landing gears and wheel wells
MM Flat White
-
Underside of fuselage and wings
MM Light Ghost Gray
-
Horizontal stabilizers, top and bottom
MM Light Ghost Gray
-
Wing tip missile rails
MM Light Ghost Gray
-
Vertical stabilizer (tail)
Floquil Signal Red
-
Top side of fuselage and wings
MM Gunship Gray and Neutral Gray
-
Nose cone
MM Navy Gloss Gray
-
AIM 9 missiles
Floquil Signal Red.
Decals
Once the paint dried and cured I hand brush two coats of Future on the model and let in dry for 3 days in preparation for decals. The kit provides decals for four different NATO F-16s. Since my F-16 has the paint scheme of the Royal Danish Air Force, I used the decals provided for that aircraft. Decaling the model was a real chore. The reason it was such a chore was it was very difficult to move the decals on the model surface. Once decaling was complete I cleaned up the model with a damp cloth, then applied a light coat of Future over the model. To finish off the model, I airbrushed it with a coat of MM Semi Gloss Lacquer Finish.
Comments
To sum up, I found this kit challenging to build, mainly because of the time I spent cleaning up parts, and the fussy decals. This is definitely not a week-end build. The parts fit was only fair, but the cockpit and external detail was good. Additionally, the instruction illustrations were excellent. Despite the problems I was satisfied with the look of the finished model. This is not a kit for beginners. I would recommend that only modelers with a good deal of modeling experience tackle the Eduard NATO Falcons Kit.
Burt Gustafson
|
Click on
images below to see larger images
|
|
|
|