1/72 Hasegawa Me 109 G6 |
|
|
Gallery Article by Eric Bade |
|
|
|

This
project started some time ago, when one of my very good friend and modeller
extraordinaire built the excellent 1/32nd scale Hasegawa Me 109 G6 in
a nachtjäger scheme. I liked the very dark and very dull color scheme. I then
decided to build the smaller 1/72nd scale little brother in the very
same markings and, as a tribute to my friend, I wanted to build my kit in the
very same configuration (opened canopy, lowered flaps etc…). My model
therefore as much is a 1/72nd scale Me 109 G6 as it is a 4/9th
model of my friends kit (4/9th = 32/72nd – ie a 1/72nd
scale kit is 4/9th the size of a 1/32nd scale model).
Construction
This model comes with all the characteristics of Hasegawa products : simple kit, good recessed panel lines, but poor in some details especially cockpit and shallow wheel wells. Construction started with the addition of a resin cockpit which was mostly painted in very dark grey. Details were added in white, red or yellow. As soon as cockpit was completed, fuselage halves were cemented together.
Time
to work on wings. As I wanted to build my kit with lowered flaps, which is not a
kit option I had to cut them carefully.
Leading
edge slats had to be lowered too, as it’s is a feature of all Me 109s. I
proceeded a different way. There basically are two options to depict lowered
leading edge slats :
-
Either
you cut slat from wing. You then can save slat, thin it and then use it. The
reverse side is that you have to rebuild the shape of the wing leading edge.
-
Or
you file leading edge of the wing to reproduce the shape of the hard wing
below leading edge slat. Reverse side is that you completely lose slat which
you’ll have to rebuild from scratch.
I
went the second way.
Working
on wing I somewhat detailed wheel wells using Eduard photo etched parts. From
this stage on, construction proceeded really fast. Landing gear struts were
detailed, brake lines were added.
|
Click on
images below to see larger images
|
|
|
Painting and decaling
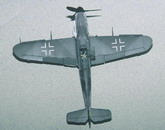
I used Gunze acrylic paints mostly. Aircraft uses RLM74, RLM75 and RLM76 mostly plus black. RLM75 and RLM74 are readily available. I made my RL76, mixing 1 part Gunze RLM65 with 3 parts Gunze matt white. I did not use pure black for lower surfaces preferring an extra dark grey (Black + dark grey mix)
My aircraft markings are available from an Eagle Cal sheet that I had in my collection. Only the yellow wing on the propeller spinner was used. National markings are spare decals from other sheets and yellow “7” individual markings were airbrushed on kit, using very simple masking. I feared decals would be too thick and would show below “black” paint that was used to subdue markings.