1/48 Tamiya F4U-1D Corsair |
|
|
Gallery Article by Alan Williamson |
|
|
|

History
The F4U-1D was a new addition to the older models with a taller tail wheel and that of a raised semi-bubbled canopy which in fact was raised about seven inches over the previous Corsair models. The F4U-1D had to pylons under the centre wing, which could carry bombs up to 1,000 ponds and that of napalm. The F4U-1D could also carry 5-inch rockets under each wing, so therefore in 1944 the F4U-1D was formally deployed as the first carrier based aircraft of the Corsair series. The F4U-1D started of by being with the Marine squadrons VMF-124 and VMF-213 aboard the USS ESSEX on the way to the Philippines, the F4U-1D was used for attacking Japan as the first operations from U.S Navy in 1945. About 3,700 amounts of F4U-1D were produced, and then it held an established position from U.S Navy because of its ability and reliance.
|
Click on
images below to see larger images
|
|
|
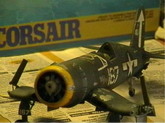
The Model
This model was built OOB apart from the antenna wire, which was made up from spure. The model has been built to represent that of VF-84 wing 167 on the carrier USS Bunker Hill February 1945. This was the second Tamiya model I had ever built and since I’ve only been back in the game for the past 2 years I have decided that Tamiya will be one of the model makers that I stick with. After I used to mainly build that of Monogram-Revell models which are by no way up to the standard of that of Tamiya. This model went to together quite well with minimal filling and sanding. The model has excellent detail both in the cockpit with the additional decal for the control panel as an, other option rather that the tedious work of trying to paint on the dials, as well as the detail of the fuselage and wings. The modeller also has the option to have the wins folded or down guess what I chose Ha Ha. This particular kit also comes with some extra parts to modify the Corsair. These parts include to types of canopies as well as to types of Cowl flaps and to types of tail wheels.
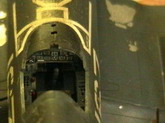
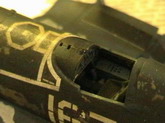
Construction
This model went together very well and was a pleasure to build. I spent around three months building this model giving about six hours a week on it and for a novice I’ am quite happy with the result. This would have to be one of Tamiya’s better models as I ‘am currently building a Tamiya P-51B and a Hayate (Frank), in which these models are good but not as good as the F4U. I would not see why a modeller would have to really go out and spend extra money on an update set for this model unless the modeller knew what the faults are if any with the cockpit. The cockpit is very well detailed apart from the lack of seat belts. The cockpit went together with out a hitch. I painted the cockpit in Humbrol No 150 green and Humbrol grey 156.
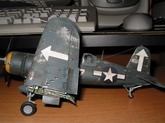
Painting and finish
The overall fuselage and wing were painted in first with my metal cote Humbrol 27001 and then I applied on top of that Humbrol gloss clear No 53. After 24 hours I used Humbrol No 77 Navy blue with the yellow ring on the cowling painted in Humbrol No 154 Insignia yellow. After an hour I hit the model with the masking tape chipping of the Navy Blue. Finishing of with the black pastel with a bit of very lite grey and brown pastel for exhaust stains on the under neath. After putting the decals on I then went over the model with a dull matt clear Revell No 2 and that is it a finished F4U.

Thanks
I cannot thank the guys that put this web site together enough, because I have obtained many new and great ideas and tips that I had always wondered how people got that sort of effect on their models. For a novice like me it has really opened my eyes as to how far the imagination can go, as well as giving modellers out there cheep and effective ways to get the finish their looking for. If you are a first time visitor to this site and or you only look at the model section I strongly recommend that you take the time to look at every aspect this site has to give. This site is fall of heaps of useful stuff, If not for this site I don’t know were I would be today with regards to building my models.
Thanks to Steve and all the other people involved in keeping ARC going.
Alan Williamson
|
Click on
images below to see larger images
|
|
|