|
After
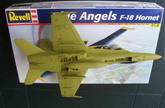
arriving in Canada as new residents, I decided to build one of the planes of the
RCAF when I saw the very cheap (CAN 15) Revell Blue Angels Hornet.
It
is molded in blue and decals are only for the US Navy acrobatic team so I bought
a set of decals for RCAF planes (“Balkan rats”) made by Leading Edge and a
resin kit by a company that now, almost 4 years after I bought it, I have
completely forgotten (sorry!).
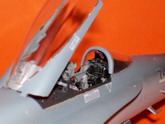
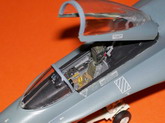
Building
the cockpit was quite straightforward, lots of little details and knobs painted
here and there. The radar screens were covered with a couple of drops of Future.
The
harnesses were made using foil paper.
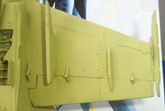
There
were several areas that I had to improve using putty and also acrylic base.
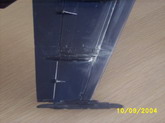
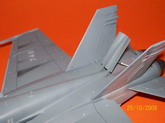
The
extra support for the vertical surfaces and their strengtheners were scratch
built using white plasticard.
Click on
images below to see larger images
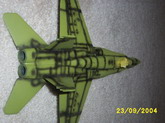
After
painting in light grey some areas to check for imperfections I gave the
whole plain a coat of protective green (primer). Then the plane was
preshaded with black paint and the airbrush.
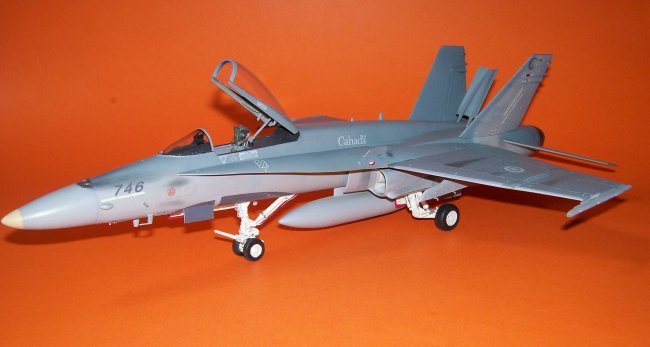
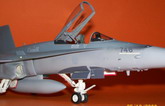
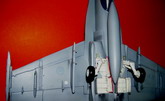
The
two tones of grey (FS 36375 and 35237) were applied after the wheel wells and
doors were painted in gloss white. The demarcation of the two greys was done by
the airbrush free hand, masking some areas with tape to prevent some over
painting.
The
project lost steam and I built other planes until…Jetstream in Discovery
Channel! This show is about the training of Canadian pilots in Alberta at 410
Sqn and broke the ice…I decided to finish the plane almost 3 years after
leaving it aside. Instead of going for a Balkan Rat, I wanted to make one of the
planes of 410 Sqn. As the paint job was finished, then I had to look for a plane
of that squadron that had the same demarcations lines along the tail and nose!
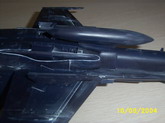
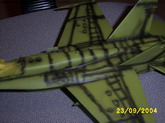
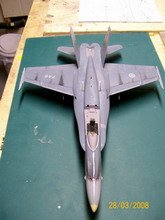
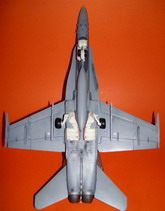
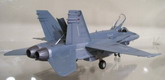
Using
information supplied by Steve, walkaround from this website and Airliners I
decided to heavily weather (probably too much) my CF-18. I used dry pastels,
sanded and the dust was applied with a brush.
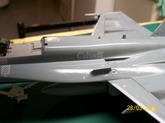
The
kit was given a generous hand of Future and then the nightmare with the decals
started.
They
cracked and broke in tens of pieces upon hitting the water! The cracks would
already been seen on the paper. Something was really wrong.
Upon
talking to the people of the hobby shop in London, I was told that they should
be old and that that happens when it’s the case. So I bought a decal solution
to make them stronger. It worked better, but still some of them were very hard
to set on the kit, even after repeated treatments of Set and Sol! A true
nightmare. For instance, the triangles in the intakes, even with the solution
mentioned above, still broke in 7 pieces, which were extremely difficult to
align. It took me one week of work with the stencils and numbers to finish this
tortuous process.
But
finally I prevailed.
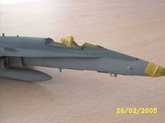
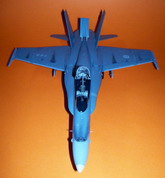
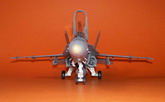
Other details I worked on where the formation lights on the fuselage (a couple
of drops of green paint and Future on the base of the clear parts), the lights
on the nose landing leg, the gunsight painted in blue and Future, the reflector
on the nose (made with Chrome silver), the actuator legs also in Chrome silver,
grids and moveable surfaces highlighted with black pencil and many others that
you can appreciate in the pictures of the finished kit.
Thanks
to Steve, Charlie Arsenault and Colin Kunkel for their support and help to
finish this tribute to the Canadian fighter pilots.
Pablo
Click on
images below to see larger images
|