|
Hi
all. Back again after many months of hard work, some traveling and overnight
modeling sessions which kept me very busy lately. Well, this is my most recent
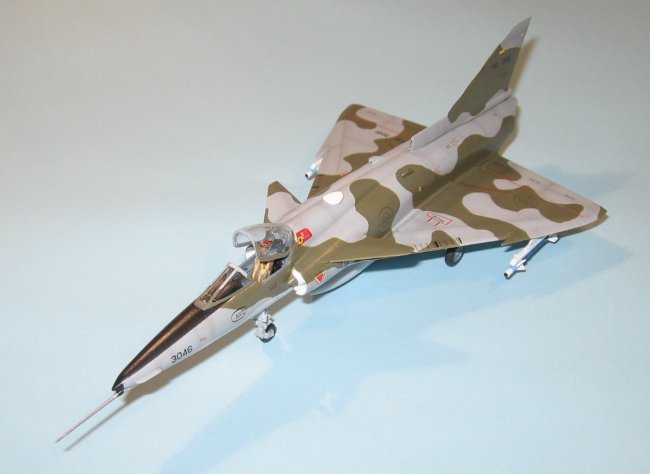
completed project: the Kfir C2 of the Colombian Air Force. I depicted the
FAC-3046, which was sadly lost in an accident in 2003, caused by a bird getting
into the motor of the jet. The pilot ejected successfully.
Colombia
received their Kfirs C2 in 1990 and received this
handsome gray-olive green camo scheme. Since then, they have been extensively
used in highly-accurate bombing missions against the criminal FARC narco-guerrillas.
Recently all planes have been upgraded to C7 and C10 standards. Only
Colombia
and
Ecuador
operate Kfirs in
Latin America
.
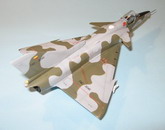
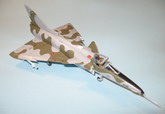
Click on
images below to see larger images
THE
KIT
I
became really disappointed about the Italeri kit, which says to be a C7 when it
is not. When I opened the box, I was happy with the crisp recessed panel lines,
acceptable cabin tub and good landing gear details. I thought I will be a
"quick build" with nice results and little effort. I was wrong.
CONSTRUCTION
Cockpit
work was not so bad. Main control panel had raised details that helped a lot.
However it didn't matched the shape of the tub and it required size adjustments.
Side walls were plain, so I had to print lateral control details in clear decal
paper. All was painted in Medium Grey.
Later
I added some weight to the nose and behind the cockpit tub to prevent tail
sitting. Fuselage was put together after placing the tub and the painted jet
exhaust (MM Metalizers Burn Metal + Jet Exhaust). Then I placed wings and that's
where the nightmare begun. As I read in other reviews, there were huge gaps in
joints between upper and lower wing pieces. They required too much putty and
sandpaper to look right. When this was done after several weeks of interrupted
work, I was ready to add canards and all additional aerials using plasticard
pieces cut and sanded to shape.
Landing
gear and weapons were build and painted apart. Colombian Kfirs used Python III
missiles and those provided with the kit were typical Sidewinders, demanding
some special attention. By using detailed pictures as reference, I modified both
missiles to make them look right.
PAINTING
First
I gave a coat of Tamiya Primer rattlecan to give a smooth surface and find seam
lines. After fixing them all with more putty and sandpaper work, the model was
ready to receive the first coat of paint. It was something difficult to match
the right colors because I found sources with different opinions, but after
getting some accurate information from a good Colombian modeler friend, Javier
Ordoñez from IPMS Bogotá, I decided to start spraying the whole belly in a mix
of Light Ghost Gray + White to get the correct Light Gray tone. After some days
I masked the paint job and painted the upper part in Light Ghost Gray. In order
to achieve the soft camo borders between the upper Gray and Olive Green, I
masked with "boli-goma" which is a gum like Blue-Tac, which have
worked very well for that purpose in my models. However I need to improve that
technique because it is difficult to achieve the same result in all paint work.
After the camouflage was completely applied and paint cured, I worked a
post-shading technique that I like very much: instead of doing pre-shading, I
spray a very diluted coat of Flat Black (about 10% in alcohol) over all panel
lines. After some few passes they look lightly darker, giving a realist effect
of lights and shades for this kind of planes, at least for me.
Wheels
and small pieces were hand-painted with small brushes and Pactra acryl paints.
For the gloss coat I used Future sprayed with my single-action airbrush, before
and after decals.
DECALS
Decals
came from the Aztec Latin Eagles I set, which is now very hard to find in the
market. Fortunately, my good friend Aldo Flores provided me a complete sheet one
year ago when we met in
Mexico City
. It was waiting for this moment since then. They worked very well, as always
with Aztec, but required a careful handle because they resisted to leave the
paper easily. Thin stencil lines were the hardest part, I even broke some, but
all they were saved and put in place as best as possible. Some few stencils were
used from the original decal sheet.
WEATHERING
Weathering
was done over the glossy surface of the plane, which allowed me to correct
decals' position several times before sealing them. Then I realized that I
should rescribe some of the recessed panel lines but it was too late for that. I
made some trials finding China-ink the best for these soft engraved lines.
Finally, all was sealed with MM Semi-gloss coat.
CONCLUSION
As
mentioned, this kit was not what I expected. It took excessive work to correct
issues that most of the modern modeling companies have fixed. Maybe the Hasegawa
offer is better. However I tried to do my best to get a good replica of a Latin
American plane I wanted in my display since a long time.
Thanks
again to Javier, who provided many pictures, articles and detailed information
about FAC Kfirs. The same to Aldo Flores for providing those excellent decals,
and to all those friends that provided some tip and advice…
A
SINGULAR STORY
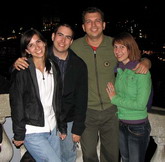
I
can't go without telling the complete story that Josip Zagar from Slovenia
posted here in October. We met thanks to ARC, exchanging some e-mails about
this wonderful hobby. In September this year, touring
Western Europe
with my wife, we had the chance to met in person in a very surprising
way.
We
arranged the meeting in the now flooded San Marco Piazza,
Venice
, in front of the main church at 4pm. The vaporetto
delayed more than expected and we were there half hour late. It was crowded with
tourists and it was impossible for us to find Josip and his girlfriend there, so
we decided to find our hotel between the narrow walking streets of the
island-city, action that took another hour. We went back to the piazza, sad for
being unable to accomplish our goal, and finally decided to have dinner in a
restaurant we picked by luck. I took seat looking at the piazza and when dinner
was served on the table, I suddenly saw a couple going out from a building just
behind my wife, in rush. I still don't understand how I suspected they were
Josip and Sabina. Then I read the sign of that building, which was a hotel, and
I realized they were looking for us in there. I ran after them leaving Claudia
still talking and giving no explanations. You can't imagine how happy we were
when I reach them! I gave them both a classical Mexican compadre's hug and took
them with me back with Claudia. Another Slovenian couple, friends of Josip,
joined us and we spend a short but delightful night in the
Pearl
of the
Adriatic
. We got lost again looking for our hotel, even with support of a GPS (hehehe),
but at the end we found it. There, we exchanged our gifts before going to the
Rialto Bridge, where they were going to take the vaporetto
to the parking area for their car and drive more than 3 hours back to Ljubljana,
but those few hours together gave us the chance to demonstrate that modeling is
not only a hobby, but also a way to build friendships around the world.
It
was a great experience and I hope we could do it again at least one more time in
this life!
Thank
you all and receive my best wishes in these holidays. Saludos desde
Monterrey
, Nuevo Léon, México, the "city in the mountains"…
Fernando
Click on
images below to see larger images
|